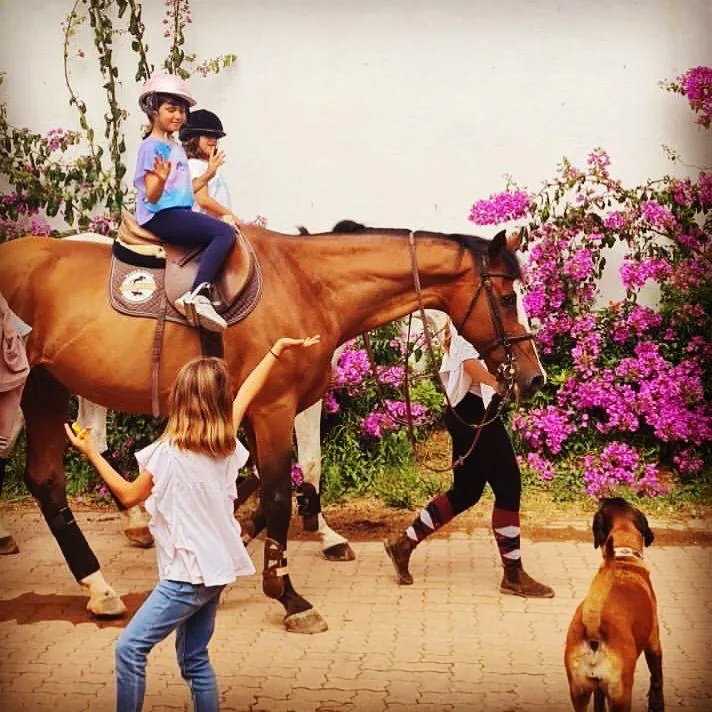
Most riders remember their first jump as a single moment: a small cross-pole, a lurch, a surprised laugh on landing. What they tend to forget is everything that came before it — weeks of poles on the ground, trotting through lines that looked pointless, and an instructor asking for the same turn again, a little more accurately.
That sequence is the real subject of this article. We already have a beginner’s introduction to show jumping that covers what the sport is, the flatwork you need first and a realistic timeline. This one picks up where that leaves off and goes into the stages themselves: what you practise at each one, why it matters, and what usually goes wrong.
It is written with the riders we teach at the Centro Hípico da Quinta da Marinha in Cascais in mind — many of them expats and long-stay visitors who rode as children somewhere else and want to pick jumping up again properly, in English.
Stage 1: Poles on the ground
Poles on the ground are where jumping begins, and plenty of riders underestimate them because nothing leaves the ground.
What you are learning
A single pole teaches you to ride a straight line to a fixed point and keep going afterwards. That sounds trivial until you notice how many riders look down at the pole, lose their line in the last three strides, and stop riding the moment the horse has stepped over it.
A line of trotting poles — usually three or four, set roughly a horse’s trot stride apart — adds rhythm. If the horse rushes or backs off, the poles make it obvious: a foot knocks a pole, or the stride goes untidy. Your job is to keep the pace identical before, through and after the line.
What you practise
- Rising trot over a single pole on a straight line, then on a circle
- A line of trotting poles, with your eyes up and fixed beyond the last one
- Trotting poles in light seat (two-point), so your balance does not depend on sitting in the saddle
- Canter poles once your canter is secure — one pole, then two set a canter stride apart
Common mistakes
Looking down. Your body follows your eyes. Pick a point beyond the poles — a letter on the fence, a tree — and ride to that.
Changing pace in anticipation. Nervous riders slow down; keen riders speed up. Both change the horse’s stride and make the poles harder, not easier.
Stopping riding afterwards. The exercise ends several strides after the last pole, not at it. Instructors will often ask for a halt or a turn at a fixed point afterwards precisely to catch this.
Distances between poles are always set by the instructor for the particular horse. School horses vary, and a distance that suits one will be awkward for another.
Stage 2: Cavaletti and raised poles
Cavaletti — known in Portuguese riding schools as cavaletes — are poles raised a short way off the ground. They are the bridge between walking over something and jumping over it.
The horse now has to lift its legs and round its back slightly, and you feel that movement come up through the saddle for the first time. It is a small effort, but it is enough to show whether your position holds.
What you are learning
The key skill here is folding — closing the angle at your hip so your upper body comes forward with the horse’s movement, while your lower leg stays exactly where it is. Riders who fold from the waist, or who stand up in the stirrups, tip forward and lose their leg position. Riders who do not fold at all get left behind and catch the horse in the mouth.
The second skill is the release: letting your hands follow forward along the horse’s neck so the horse can use its head and neck freely. At this stage most instructors teach a simple crest release, resting the hands on the neck a little way up the mane. It gives you something steady to lean on while your balance develops, and it protects the horse’s mouth.
A useful test
If you can trot a line of raised cavaletti in light seat, hands resting forward, and arrive at the end in the same rhythm you started with, you are close to ready for a small fence.
Stage 3: The first fence and the five phases of a jump
Your first real fence will almost certainly be a small cross-pole, approached in trot, often with a placing pole on the ground in front of it. The cross guides the horse to the middle; the placing pole helps put it at a comfortable take-off point, so you do not have to judge distance yet.
At this point it helps to understand that every jump, from a 40cm cross-pole to a Grand Prix wall, has the same five phases.
1. Approach
Everything that decides a jump happens here. A straight line, a consistent rhythm, and a rider looking beyond the fence. A good approach makes the jump easy; no amount of effort in the air rescues a poor one.
2. Take-off
The horse shifts its weight back and pushes off. Your job is to stay out of the way — lower leg steady, heels down, eyes up. Beginners often try to “help” by throwing themselves forward before the horse leaves the ground. It does not help.
3. Flight
You fold, your hands release, and you allow the horse to move underneath you. Over a small fence this lasts a fraction of a second; the aim is simply to be balanced and not to interfere.
4. Landing
The horse lands on its front legs first, which pushes your weight forward. A secure lower leg is what keeps you in the saddle here. This is the phase where weak position shows — riders who have been gripping with the knee tend to pivot forward on landing.
5. Getaway
Sit up, re-establish rhythm, ride a straight line away and then a planned turn. Most falls from beginners over small fences come not in the air but in the few strides after landing, when the rider stops riding.
Your instructor will talk about these phases constantly, even over tiny fences, because the habits formed at 40cm are the ones you will still have at a metre.
Stage 4: Gridwork
A grid is a series of small fences or poles set at fixed distances, one after another. It is the most efficient teaching tool in jumping, and it is where many riders make their biggest progress.
Why grids work
Because the distances are set for the horse, you do not have to worry about where the horse takes off. That frees you to concentrate entirely on your own position and balance, jump after jump, in a controlled way.
A typical early grid might be a trotting pole, a small cross-pole, then a small upright one canter stride later. As the rider settles, fences are added or raised a few centimetres.
What you practise
- Keeping your eyes up and your lower leg still through several efforts in a row
- Staying folded and balanced without anticipating each fence
- Riding the grid with your arms out to the side, if your instructor thinks you are ready — an exercise that quickly reveals whether your balance is really independent of the reins
What gridwork does not teach
Grids take the decision-making away from you, which is exactly why they are useful early on. But a course needs you to choose a line, set a pace and find your own way to each fence. That is the next stage.
Stage 5: Related distances and turns
Before a full course, riders learn to link fences: two fences on a straight line with a set number of canter strides between them, then a fence followed by a turn to another.
Counting strides
On a related distance, you learn to count the strides out loud or in your head, keeping the canter even so the horse arrives correctly at the second fence. Too much pace and you get fewer, longer strides; too little and the horse has to add one. Learning to adjust — gently, early, never in the last stride — is a core jumping skill.
Riding the turn
Most jumping mistakes at lower levels happen in the turns, not over the fences. Cut the corner and you arrive at the next fence at an angle; drift wide and you lose rhythm and time. A good turn uses the whole corner, keeps the horse balanced on the outside rein, and lands you on a straight line with at least three or four strides before the next fence.
This is where your flatwork pays off. Everything you practised on circles and changes of rein is now what gets you to fence number two.
Stage 6: Your first course
The first course, or percurso as you will hear it called in the arena here, is usually four to six small fences with simple turns, at a height you already jump comfortably in grids. The height stays low on purpose: the challenge is linking the fences, not clearing them.
Walking the course
Before you ride, you walk it on foot, as competition riders do. Your instructor will show you how to:
- Learn the order of the fences and where you start and finish
- Walk the exact line you intend to ride, including the turns, rather than walking straight from fence to fence
- Pick a point beyond each fence to aim at
- Decide where you will trot or canter, and where you might make a transition if things get quick
Riding it
Treat the course as a flatwork exercise with fences in it. Establish a good canter before the first fence, ride each line and turn as planned, and keep the rhythm the same throughout. If a fence goes wrong, circle away, re-establish the canter, and represent — nobody is timing you.
When a course feels boring rather than exciting, you are ready for the fences to go up a little.
Is jumping for you if you are only here for a while?
Some of the riders who ask us about jumping are in Cascais for a few weeks or months. It is worth being straightforward about what fits.
If you ride regularly and are here for a season, a structured jumping progression through horse riding lessons is realistic. Riders who want to go further, towards schooling shows, can move on to competition training.
If you rode as a child and want to return, expect to spend a few weeks back on the flat first. Old habits — gripping with the knee, looking down — come back quickly and are easier to fix before fences are involved.
If you are here on holiday for a week or two, jumping progression is hard to fit in. A trail ride through the Sintra-Cascais Natural Park is a better use of the time, and more memorable.
Lessons are taught in English, Portuguese and French by an instructor certified as a Monitor by the Federação Equestre Portuguesa since 1997. Helmets are available at the centre; if you have your own well-fitting helmet and boots from home, bring them.
Prices
Jumping lessons are riding lessons — there is no separate jumping fee. Group plans are €140/month once a week, €240/month twice and €340/month three times, with a one-off €150 registration fee on monthly plans. A 12-lesson card at €600, valid six months, suits riders with irregular weeks. Single lessons are €60 (about an hour) or €80 private. All prices exclude VAT; see the full price list.
Frequently asked questions
How do I know I am ready to start jumping? When you can ride a steady, balanced canter on both reins, hold light seat in trot without using the reins for balance, and steer accurate lines and turns. Your instructor will usually suggest it before you ask.
What height is a first course? Low — often around 40 to 60cm, and always a height you already jump comfortably in grids. The difficulty of a first course is linking fences and turns, not the size of the fences.
Why do we spend so long on poles? Because poles teach line, rhythm and position without risk. Nearly every problem riders have over fences shows up first over poles, and it is far easier to fix there.
Is private or group better for learning to jump? Both work. Private lessons give more repetitions and closer correction, which speeds up the early stages. Group lessons are good for watching others ride the same exercise and for learning to share an arena safely.
Can I jump on a school horse? Yes. Experienced school horses are ideal for learning, because they are honest, consistent and forgiving of the small mistakes every beginner makes.
Do I need to speak Portuguese for jumping lessons? No. Lessons are taught in English. You will pick up a few arena words — percurso for course, cavalete for cavaletti — without trying.
Next step
Jumping is a long sequence of small, achievable steps, and every one of them is worth doing properly. If you would like an instructor to assess where you are and plan the route from poles to your first course, the first lesson is the place to start.
→ Get in touch to book a lesson in Cascais → See the full price list → Read about competition training